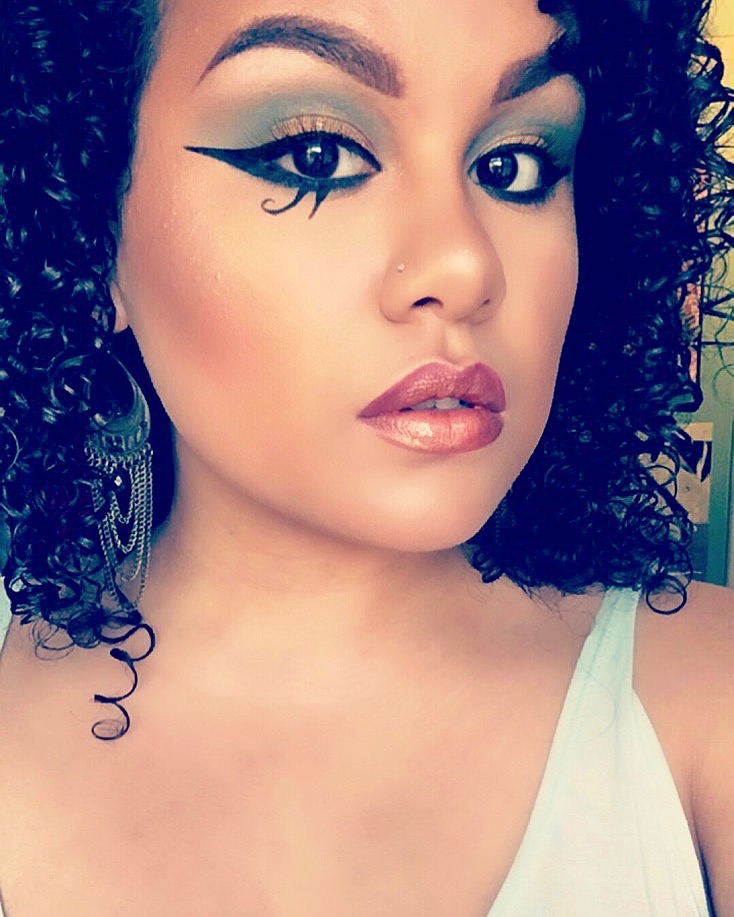
Halloween Makeup Tutorial: Ancient Egyptian Queen
Be a Queen this Halloween!
All-Hallows-Eve is right around the corner and I could not be more excited. I enjoy getting into the spirit of Halloween by really doing up my face.
Having always had a love for the makeup style of the Ancient Egyptians, I couldn't think of anything better. No crazy face paint needed for this look! Here is a breakdown of everything I did.
**Please keep in mind, that you can use whatever you have for this look, and do everything according to your personal preferences. Makeup is fun, so don't be afraid to have it!
Step 1: Prep the Area
To neutralize the eyelids, apply a rice-grain-sized amount of eyeshadow primer or concealer on the lips and blend. This ensures that the bold colors really pop.
After you have blended out your base, use a skin-colored eyeshadow or setting powder to set it in place.

Step 2: Define the Eye
Ancient Egyptians were all about the eyes, so it is very important to contour the eye to give it more definition. It is also a great guide for where you want to put your shadow since you will be using bright colors.
My trick is to take a brush handle to find my crease, and then take a neutral color that is one to two shades darker than me to shade it in.


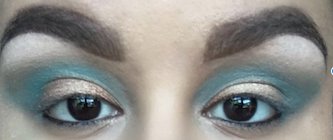
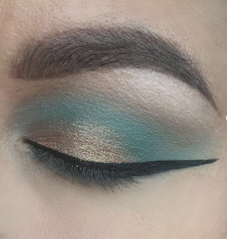
Step 3: Light Blues
In the same area that we contoured the crease, shade in a light blue/turquoise shade starting from the out corner, and blending in towards the inner corner of the eye. Once the color is laid down, start buffing it up and out to get rid of any harsh edges.
You will find, with the second step done, that this blue will blend easily.

Step 4: Deep Blues
With a darker blue, go deeper into the crease. And my deeper, I mean go right into the eye socket to create depth.
Again, once the color is laid down blend it into the lighter blue to create a nice gradient between the two colors.

Step 5: Gold Plated
Ancient Egyptians loved gold. It's only right that we put it into this look. Take a shimmery golden/bronze color and pack in onto the lid to get the most pigmented result.
Take whatever is left on the brush that you used for the blue shadows, and blend around the edge of the gold to take away any harsh lines. There is no right or wrong to this, just blend as needed.

Step 6: Spotlight
Apply a lighter gold on the very center of the lid, and blend the edges out into the first gold color.

Step 7: Smoke it Out
Line the water line with a black liner. Then with a small liner brush, take a black eyeshadow and smoke out the lower lash line to your liking.

Step 8: Clean it Up
You may have some fallout from the shadows, which is why I like to clean up with concealer here. I already had a foundation on before starting the eyeshadow, but If you hadn't done so yet you can apply it in this step.
Apply a concealer that is one to two shades lighter than you to highlight your features as well. Put it under your eyes, down the center of your nose, center of the forehead, on the chin, and around the mouth. Blend everything in and set with a translucent power so the concealer won't crease.


Step 9: Plot it Out
Black liner was the focus of the Ancient Egyptians' look. With the same liner brush and black shadow, create a line that will be the guide for the wing liner.
I went straight out from the outer corner of my eye and stopped at a point right below the end of my eyebrow. Notice how the line is flat across the bottom of my eye, and not angled up the way we are used to lining our eyes today.

Step 10: Finish it Off
Taking a liquid or gel liner, create a triangle using the black eyeshadow as a guideline. Fill in the wing and connect it to your top lash line.
I also made the point of the wing kind of blunt instead of sharp, which is how it was worn a lot of the time in Ancient Egypt.

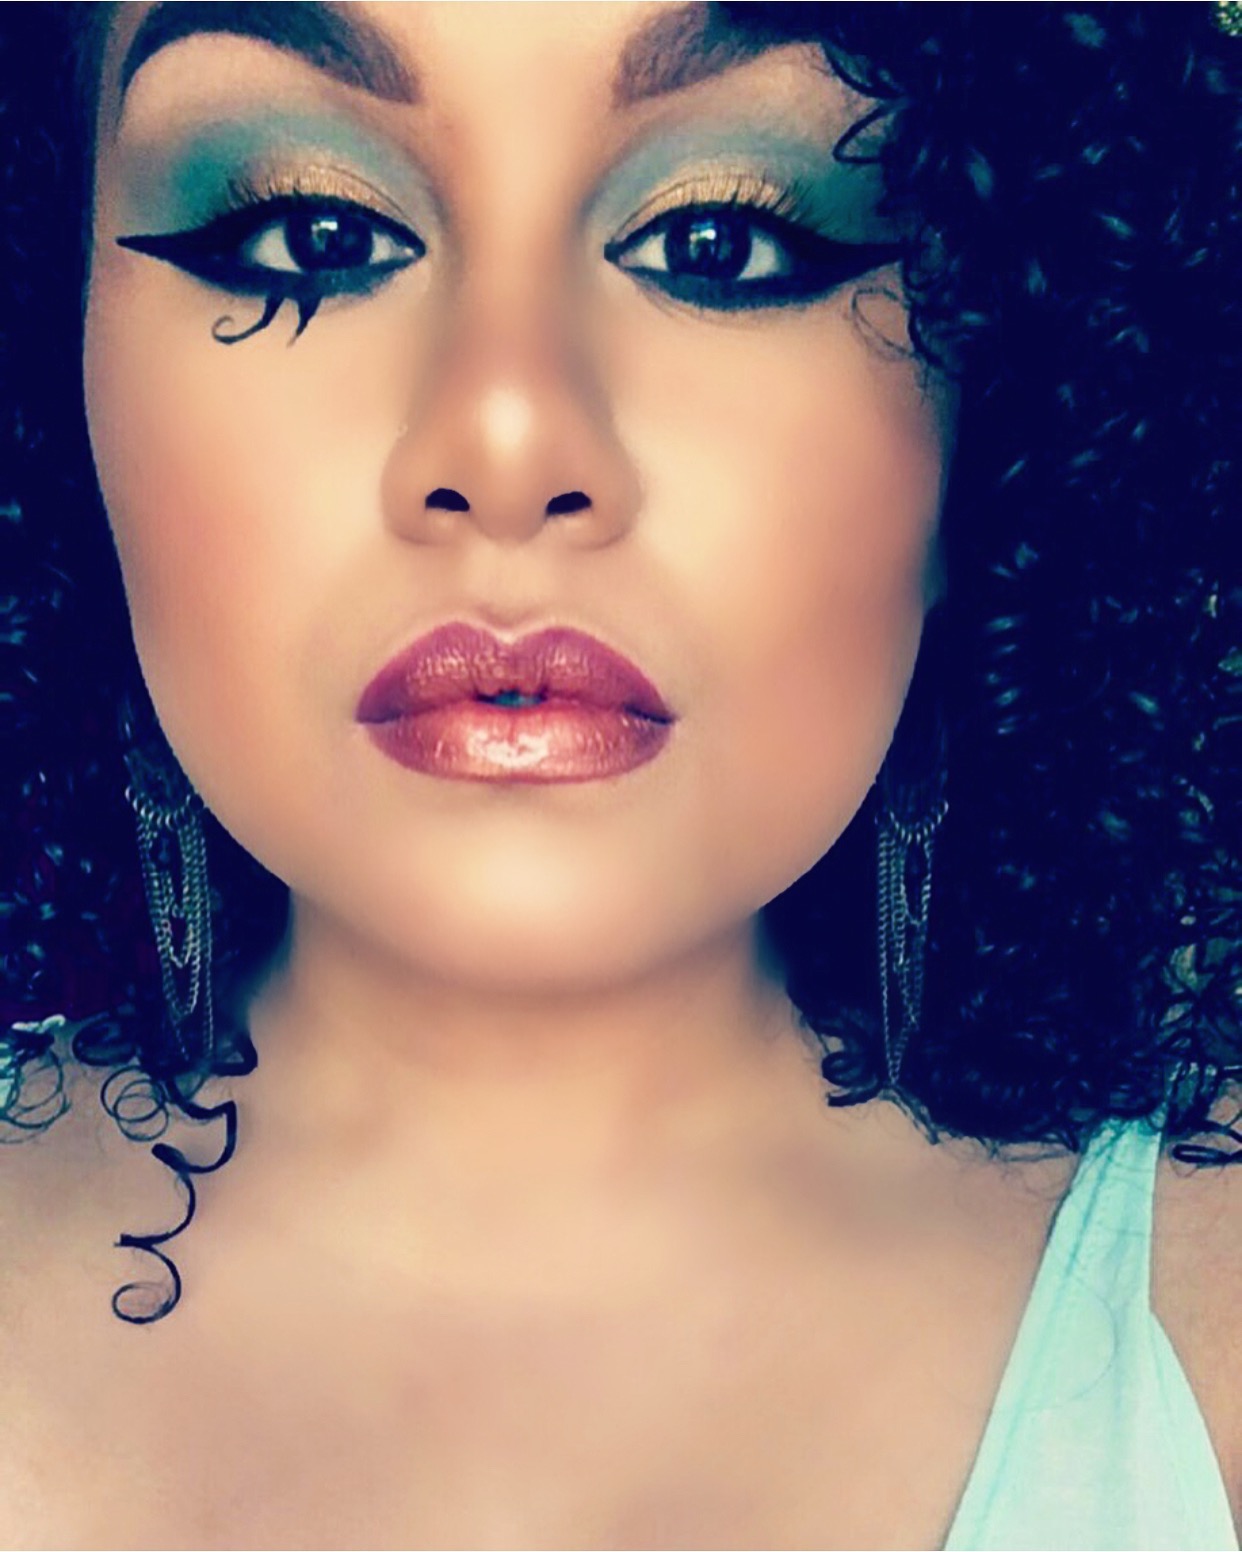
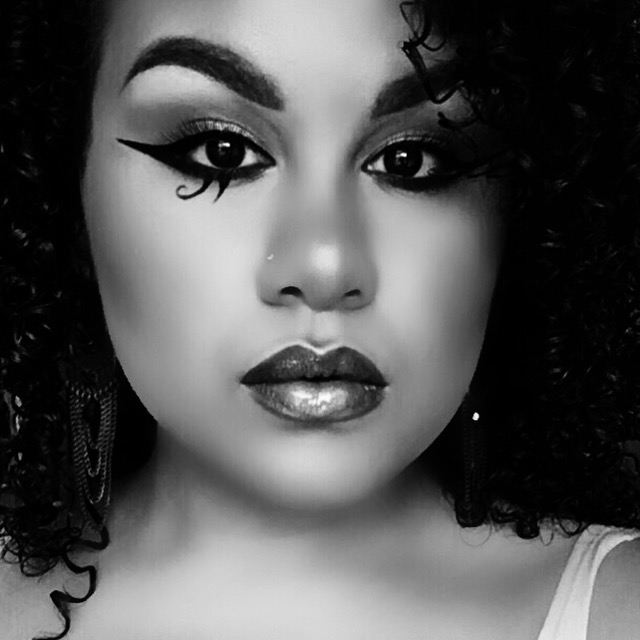
Step 11: Eye of Horus
Using a straight edge plot out two lines under your eye. Thicken the one closest to the inner corner of the eye, and keep it straight. Make the outer line swirl on the end.


Step 12: Lash-Out
Mascara, mascara, mascara! Feel free to add lashes as well if you have them.

Step 13: Bronzed Goddess
Using a matte bronzer, apply it starting from the corner of the ear and bring it down towards the corner of the mouth. Start blending it up and out to create the look of a more defined cheekbone.

Step 14: Dipped in Gold
Apply a golden highlight to the tops of the cheekbones, down the center of the nose, center of the forehead, cupid's bow of the mouth, and on the chin.
Basically, apply it everywhere!

Step 15: Kiss it Better
Line the lips with a light berry shade. Fill in the top lip. On the bottom lip, apply the gold highlight that was used on your face, and press your lips together to distribute the color.
Lastly, apply a clear gloss to mix everything together.


Step 16: SLAY